Dialpad Meetings lets users quickly and easily adjust their meeting settings at any time. You can personalize your meeting URL, PIN settings, audio greetings, hold music, and other features to create a customized experience.
Let’s dive in!
Access Dialpad Meetings Settings
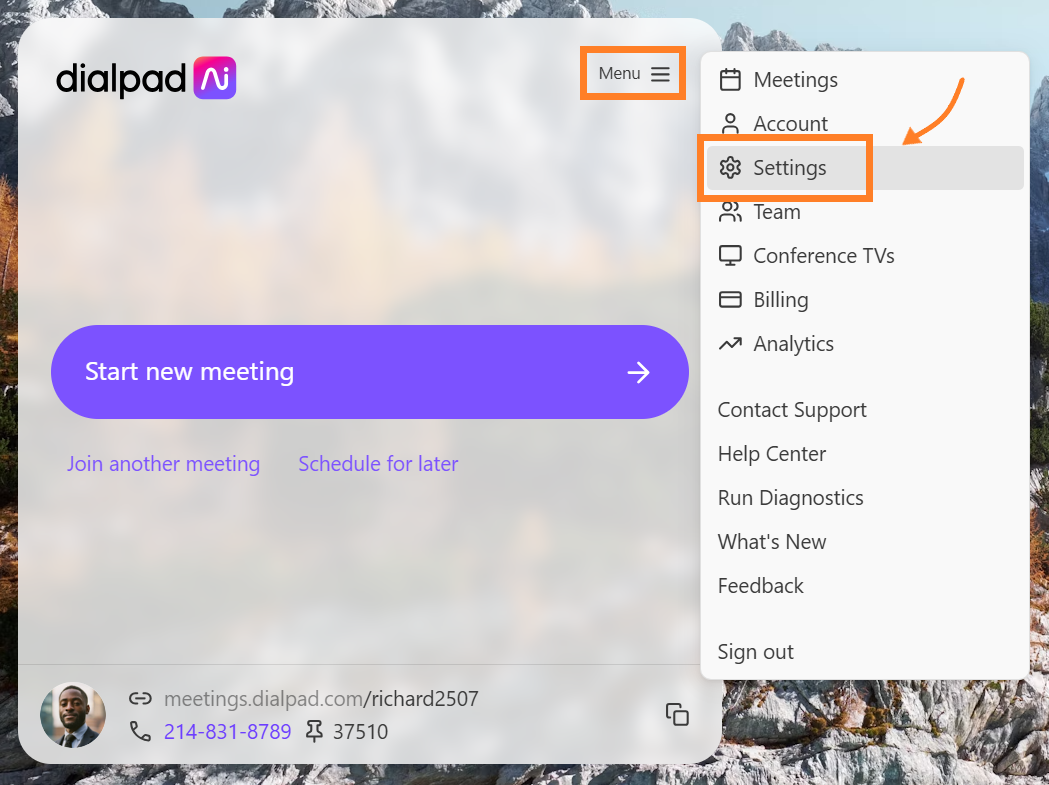
To access your Dialpad Meetings settings, go to your Dialpad Meetings Dashboard.
Select Menu
Select Settings
Notes
Depending on your permissions, you might not see all of the settings mentioned in this article.
The availability and customization of meeting settings for individual users depends on the permissions set by your admin.
Let’s explore your Dialpad Meetings settings and each of the customization options.
Change meeting URL
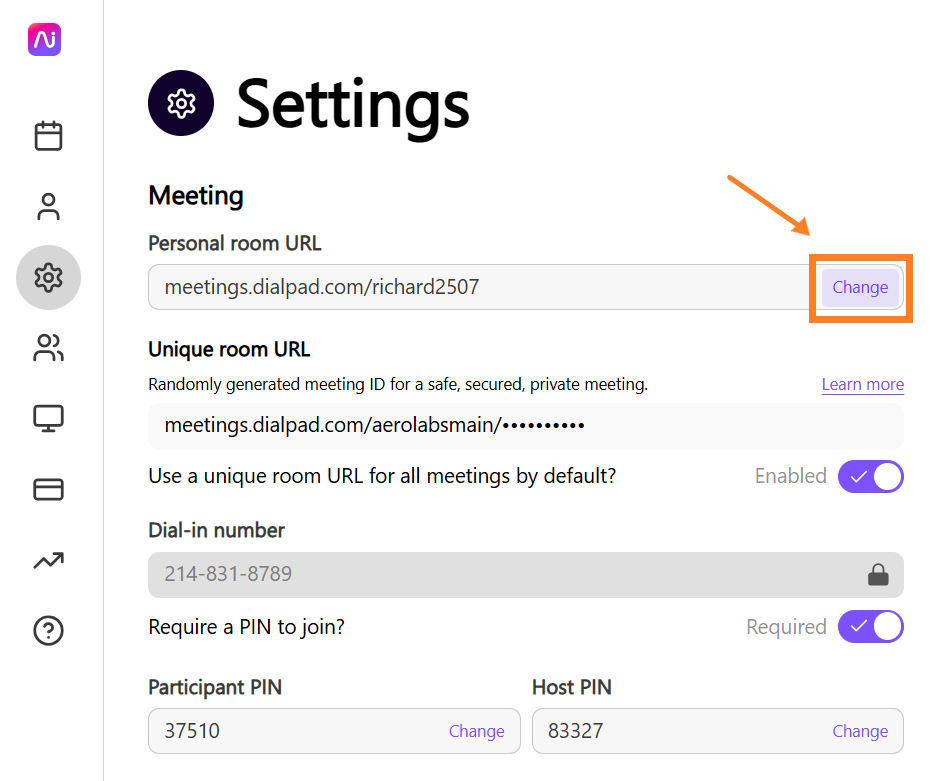
To change your personal meeting URL, head to your Dialpad Meetings settings.
Navigate to Personal room URL
Select Change
Enter the new meeting URL
There’s a minimum of 5 characters.
Select Confirm
.png)
Enable Meeting PIN
Add another level of security by using PIN.
To add a PIN requirement for participants, head to your Dialpad Meetings Settings.
Navigate to Require a PIN to join?
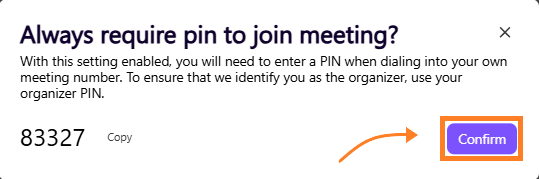
Toggle the slider on
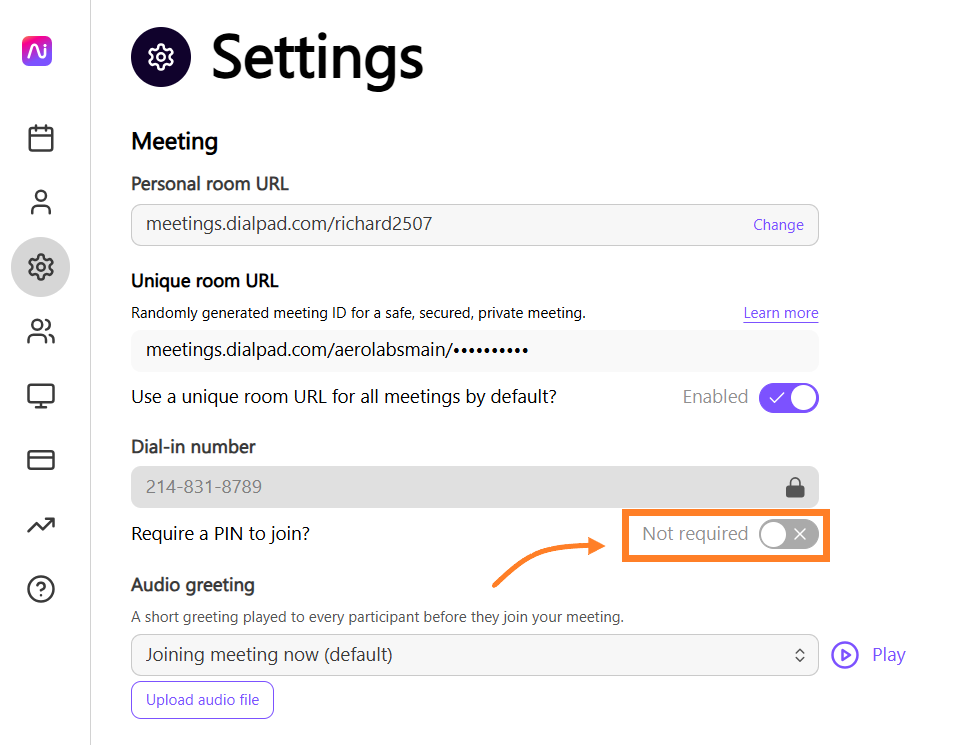
Select Confirm
Tip
Learn more about managing your Meeting PIN in this Help Center article.
Audio greeting
Set an audio greeting that participants will hear before they join your meetings. You can use Dialpad Meetings' default audio greeting, or select a custom greeting.
Note
To use an audio greeting, you must be a Dialpad Meetings Business user, and an Admin must enable the Custom Greeting setting.
To set a customized audio greeting, head to your Dialpad Meetings settings.
Navigate to Audio greeting
Select Upload audio file
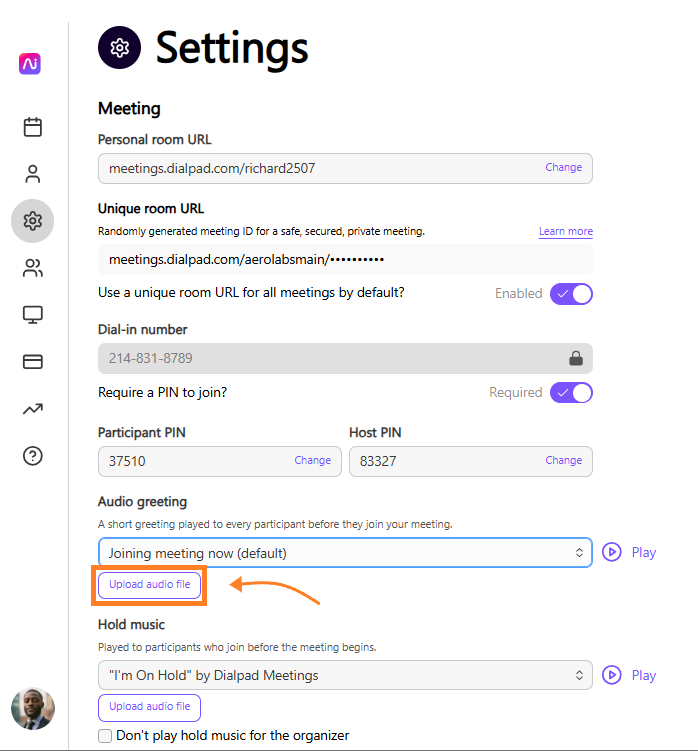
Select the file from your device
Audio files cannot be larger than 10MB and must be in an MP3 format.
Hold music
Choose what music you want participants to hear while waiting for the meeting to start. You can use Dialpad Meetings' default hold music, or select custom music.
Note
To customize your hold music, you'll need a Dialpad Meetings Business license, and an Admin must enable the Custom hold music setting.
To customize your hold music, head to your Dialpad Meetings settings.
Navigate to Hold music
Select Upload audio file
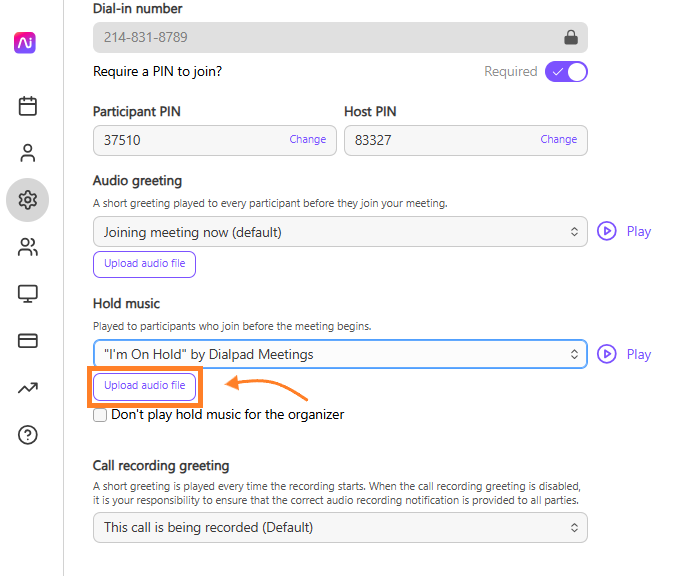
Select the file from your device
Note
The audio file must be an MP3, and cannot exceed 10MB in size.
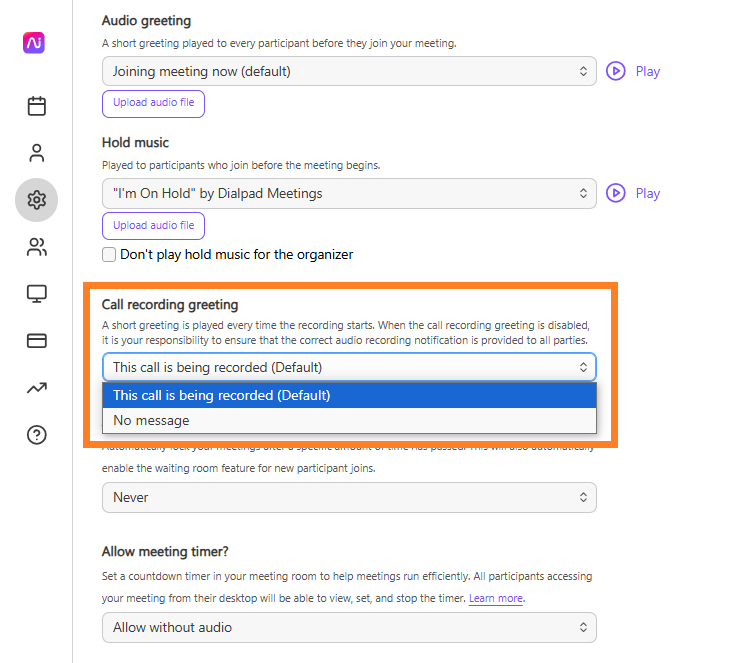
Call recording greeting
Use a call recording greeting to inform participants when a meeting is being recorded.
When enabled, all participants will hear 'This meeting is being recorded' when the recording is turned on.
To enable the call recording greeting, head to your Dialpad Meetings settings.
Navigate to Call recording greeting
Select the greeting you want to callers to hear
Tip
Don't forget to pay attention to your local legislation. If the call recording greeting is turned off and your state requires notification, you must verbally inform the meeting participants.
Auto-lock & waiting room
Use Dialpad’s auto-lock feature to lock your meetings after a set time.
Once a meeting is locked, users who attempt to join your meeting will be sent to your waiting room, where they will wait until you, or a Co-Host, lets them in. While waiting, hold music will play for anyone in your waiting room.
To enable auto-lock, head to your Dialpad Meetings settings.
Navigate to Auto-lock meetings and activate the waiting room?

Select your preferred time from the drop-down menu
Meetings can be auto-locked as soon as the meeting starts, or after a specific period of time.
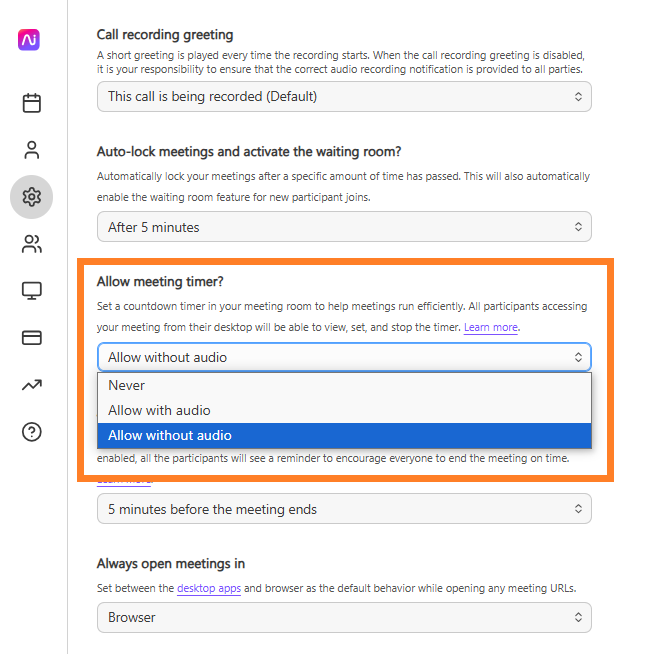
Meeting countdown timer
Set a meeting timer to keep meetings on track by showing the remaining time, helping everyone stay focused and finish on time.
To enable a timer, head to your Dialpad Meetings settings.
Navigate to Allow meeting timer?
Select Allow with audio or Allow without audio
Note
While the organizer needs a Dialpad Meetings Business license, any participant can view, set, and stop a meeting timer.
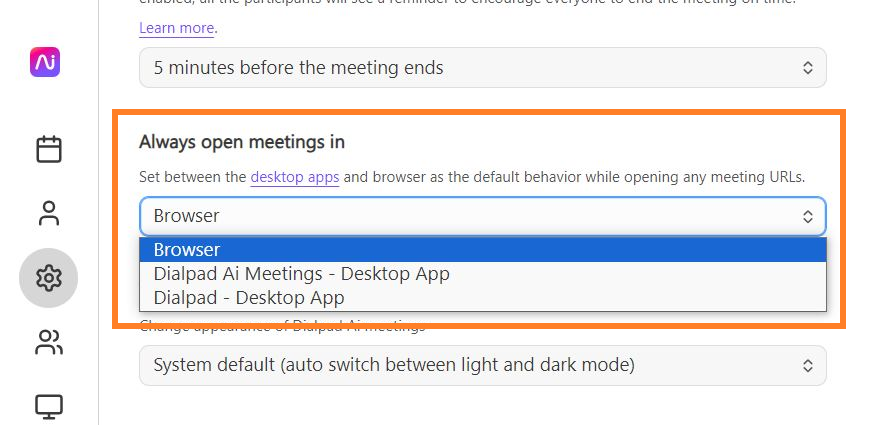
App preference
You can choose to use either the Dialpad Meetings app or your web browser for your meetings.
To set your Dialpad Meeting app preference, head to your Dialpad Meetings settings.
Navigate to Always open meetings in
Select your app preference from the drop-down menu
Note
Some companies can't use third-party software due to compliance rules. The App preference lets users start Dialpad Meetings from the desktop app instead of a browser.
Other meeting settings
Dialpad Meetings offers a range of additional settings, giving you more control over how your meetings experience.
Under the Dialpad Meetings main settings, you'll find a variety of other options that can be easily toggled on or off.
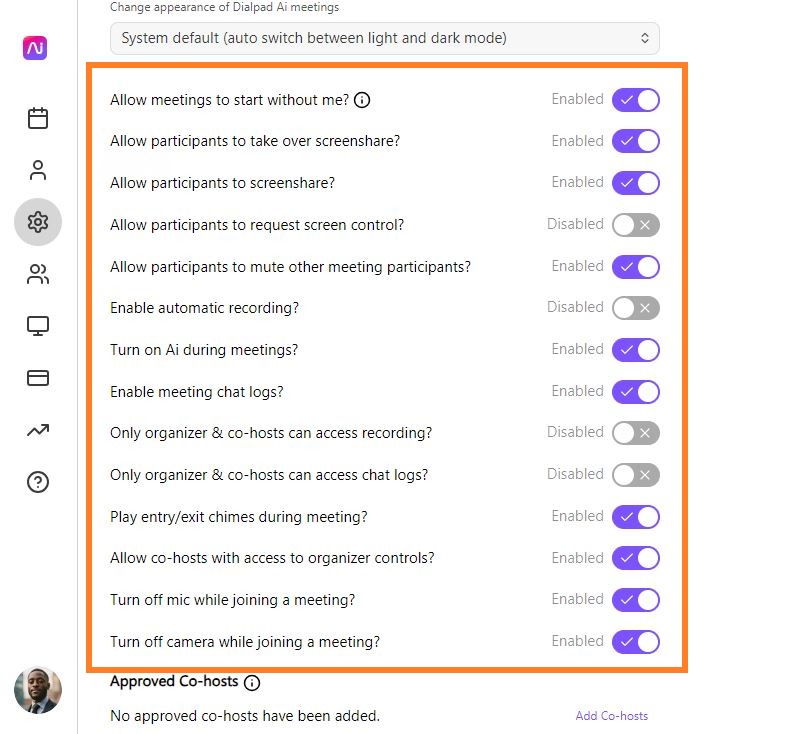
Allow meetings to start without me: Lets meetings begin before you (the organizer) arrive.
When this setting is turned off, participants will be sent to your waiting room until you arrive.
Allow participants to take over screen share: Allows participants to take control of the screen share without interrupting the current presenter.
Allow participants to screen share: Allows participants to share their screen during your meeting.
Allow participants to request screen control: Participants can request to take over the screen share, prompting the organizer to accept or deny the request.
Allow participants to mute other meeting participants: Gives all participants muting controls during a meeting.
Enable automatic recording: Automatically turns on meeting recording.
Video recording is limited to Dialpad Meetings Business.
Turn on Ai during meetings: Ensures all your meetings start with Dialpad Ai turned on.
Enable meeting chat logs: Saves the chat transcripts and stores them in the call summary.
Only organizer & co-hosts can access recording: Ensures that only you (the organizer) and your co-host can access the meeting summary, including the option to play or download recorded audio.
Only organizer & co-hosts can access chat logs: Ensures that only you (the organizer) and your co-host can access your call summary, including the option to view chat logs.
Play entry/exit chimes during call: Plays an audible chime to the organizer each time a person joins their meeting, and a different sound as the last 5 participants leave.
When turned off, there will only be an audible chime when the first person joins your meeting.
Allow co-hosts with access to organizer controls: Allows other participants to have organizer privileges during an active meeting.
Turn off mic while joining a meeting: Your mic will automatically be muted when you join a meeting.
Turn off camera while joining a meeting: Your camera will automatically be turned off when you join a meeting.
Note
Some of these settings require a Dialpad Meetings Business license, and team members may need to request them as an option through their Admin.
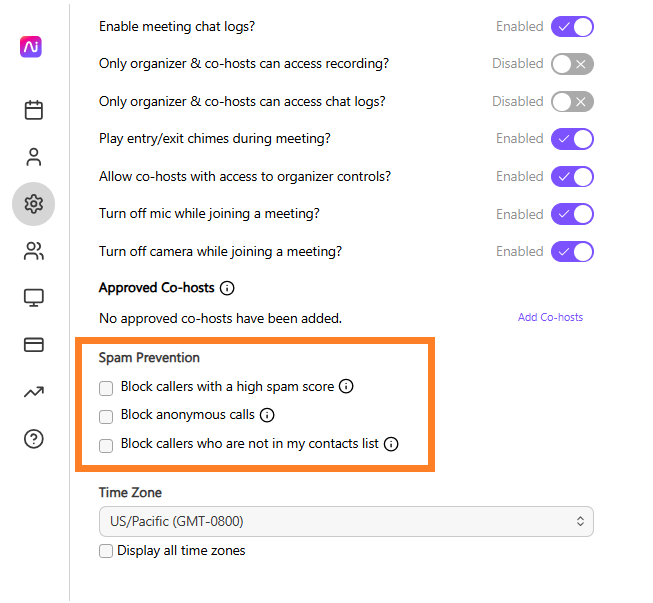
Spam prevention
Use the Spam Prevention settings to control which calls are considered spam and determine how they are handled.
To set your Dialpad Meeting spam preferences, head to your Dialpad Meetings settings.
Navigate to Spam Prevention
Check the boxes beside your preferences
For more details on spam prevention, please refer to this Help Center article.
Language
Choose what language you want to use in Dialpad Meetings. Your selected language will automatically apply to the native app.
Dialpad Meetings supports the following languages:
English
French
German
Japanese
Spanish
Portuguese
Mandarin
Italian
Russian
Dutch
Chinese
To set your language preference, head to your Dialpad Meetings Settings.
Navigate to Language
Select your preferred language from the drop-down menu

Note
Dialpad Meeting users linked to a Dialpad account can select their preferred language in their personal Dialpad Settings.
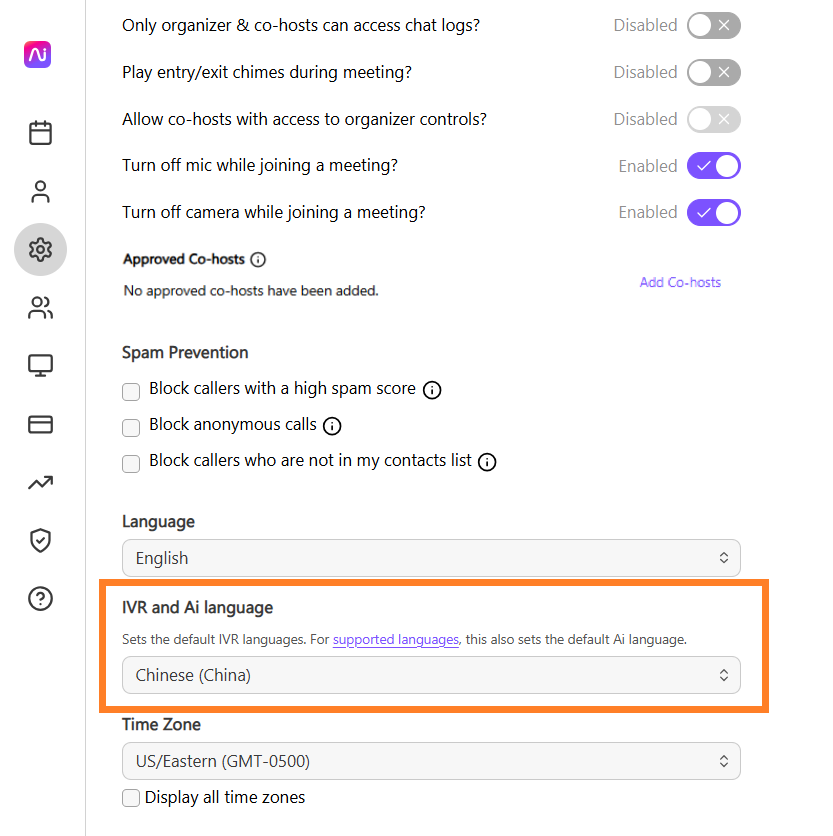
IVR and Ai language
To set the language for your Dialpad Meetings IVR and Ai language, head to your Dialpad Meetings Settings.
Navigate to IVR and Ai Language
Select your preferred language from the drop-down menu
Time zone
Set your Dialpad Meetings timezone and change it when you’re traveling.
To set your Dialpad Meetings timezone, head to your Dialpad Meetings Settings.
Navigate to Timezone
.png)
Select the timezone from the drop-down menu
If you don’t see your timezone listed, check the box beside Display all timezones.
My Notifications
Your personal Dialpad Meetings notifications can also be managed and updated anytime.
To update your notification preferences, head to your Dialpad Meetings Settings.
Navigate to My Notifications
Check the boxes beside your preferences

Note
These preferences only apply to meetings that you schedule. If you want to stop receiving notifications for meetings that you’ve been invited to, you’ll need to contact the meeting organizer.
Learn more about how Meeting notifications work in this Help Center article.