Dialpad Meeting Rooms use the Poly Studio X30 or X50 conference room devices, and an accompanying TC8 touch controller as a Dialpad meeting room/Conference TV.
Let's walk through the setup process, and remember, if you encounter any difficulties don't be shy to get in touch with the Dialpad Support team.
Requirements
Hardware
- Available Ethernet port for the Studio device. The X30 and X50 do not have WiFi capability.
- PoE Ethernet connection or PoE injector for the TC8 controller.
- TV or monitor with HDMI input for video. The X30 and X50 have microphones and speakers built-in.
- Firmware version 3.2.1 or higher on the X30 or X50 device. See Updating the System, below.
Licensing/Configuration
To use room devices with Dialpad Meetings, you'll need the following:
- A Dialpad account with voice services: Standard, Pro, or Enterprise level
- At least 1 TALK license user with Company Admin permissions
- At least 1 paid Dialpad Meetings License. The Free license does not support connecting to meeting room devices
- At least 1 Dialpad Meetings Device License
- Have Customer Support enable conference room devices for the user account
Learn more about the different Dialpad Meetings license types, and how to purchase them here.
Installing Your Polycom Device
Hardware Setup
Polycom has great setup documents that should be included in your packaging. For reference:
If you have a TC8 (touchscreen) please be sure to connect and pair it to your Poly Studio device.
Installing the Poly Studio X30 / X50
- Unpack your X30 / X50 and set it up near your TV/monitor.
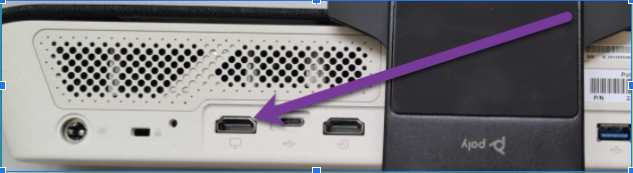
- Connect an HDMI cable to the device’s HDMI output port 1 to your TV’s HDMI input port. The output port will have a TV icon, not an arrow pointed at a circle.
- X50: use the second HDMI port from the top, with the TV icon labeled “1”.
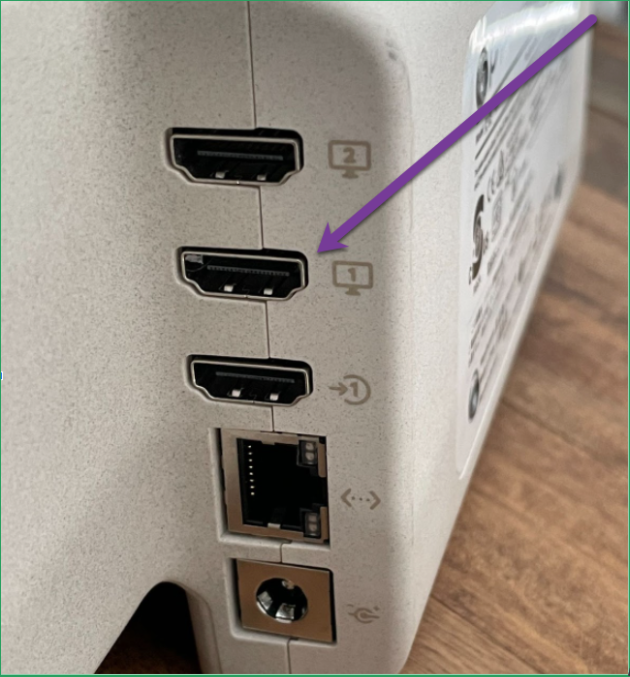
- X30: use the first HDMI port from the left, with the TV icon.
- X50: use the second HDMI port from the top, with the TV icon labeled “1”.
- Attach the LAN cable to your router/port.
- Use the included power adapter to connect the device’s power input to a wall outlet.
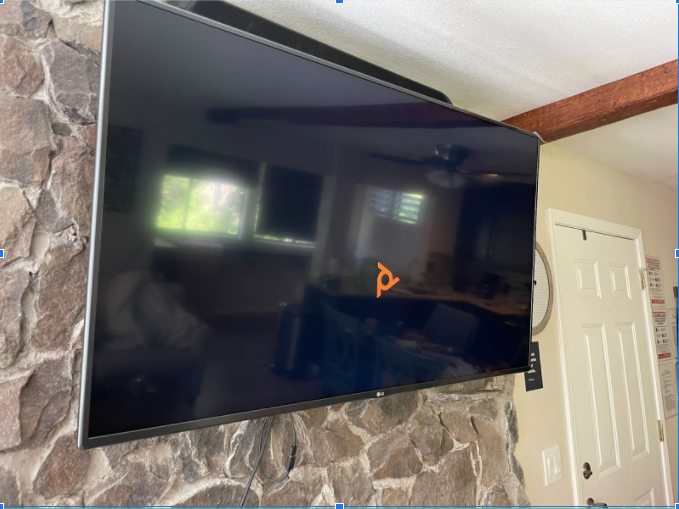
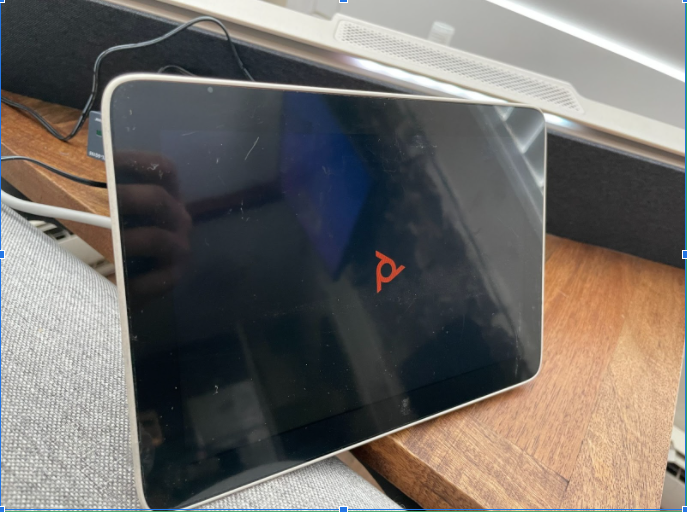
- The Studio device will power on and your TV will show a spinning Poly logo.
Installing the Poly TC8
- Unpack your TC8 and set it up on the conference room table, or somewhere within reach of meeting participants.
- If your router does not have a PoE port, set up a PoE injector between the device and the network wall port.
- An example of a PoE adapter setup. The specifics will depend on your adapter.
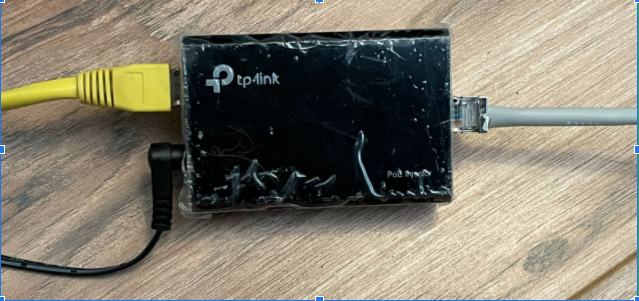
- An example of a PoE adapter setup. The specifics will depend on your adapter.
- If your router does not have a PoE port, set up a PoE injector between the device and the network wall port.
- Connect the TC8 to the PoE port on the wall or PoE injector.
- The display will power on and show the Poly logo.
Connecting Your Room Device Under Dialpad Meetings
Once your new Poly Studio device is set up, we'll connect it to Dialpad Meetings.
Choosing Dialpad as the conference provider
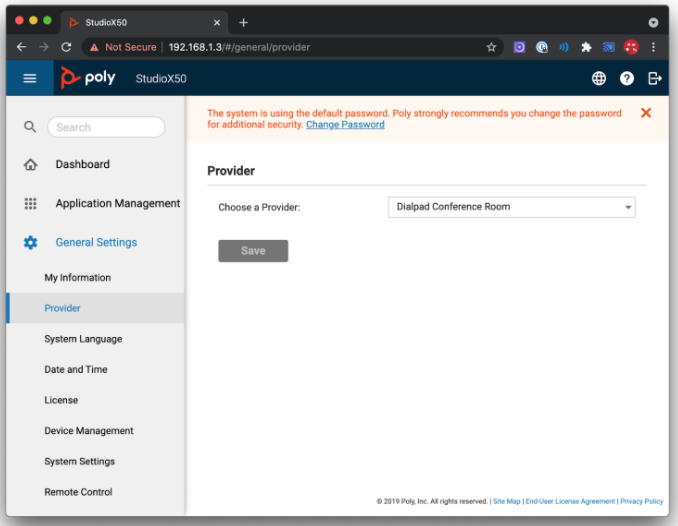
- Login to the admin panel for the Poly Studio device. See Troubleshooting (below) if you have questions on this.
- On the left panel, navigate to General Settings → Provider.
- In the dropdown, select Dialpad Conference Room.
- If you can’t find Dialpad in the list, it's likely your device has not updated to the minimum version. You can learn more about updating your system by going to Updating Your System section (below).
Adding the Conference TV to Dialpad
Requirement: Only Dialpad Company Administrators are allowed to set up room hardware devices.
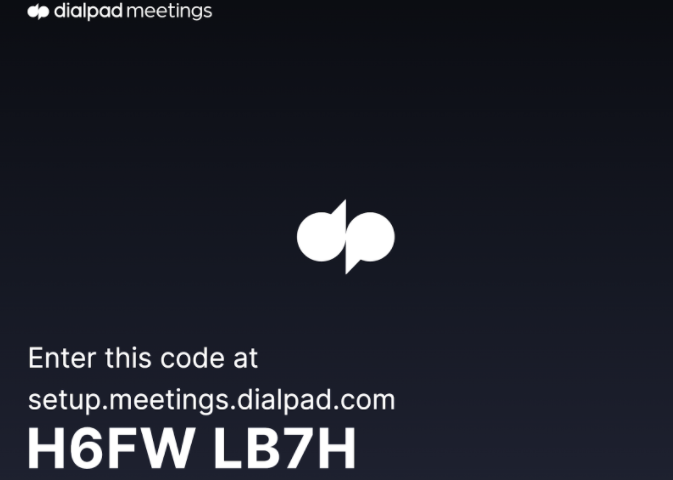
- At this stage, your TV should show a Dialpad Meetings landing page with an eight (8) character setup code.
- In your browser:
go to meetings.dialpad.com→ Menu → Conference TV’s,
-or-
go to setup.meetings.dialpad.com (then skip to step 4)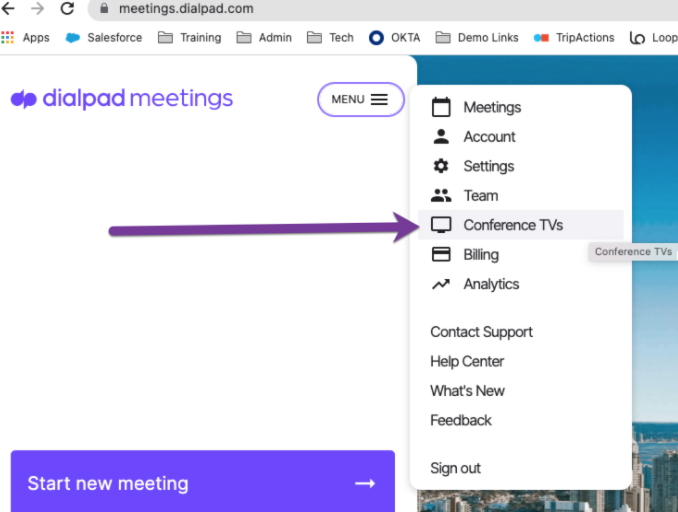
- Click Set up a new TV.

- You will be redirected to this screen
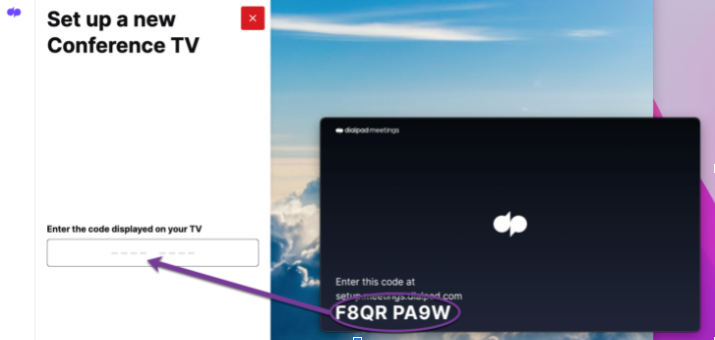
- Enter the code from the TV in the Enter the code box.
- Submitting a valid code will proceed to the next screen. Continue to the Room Resource and Calendar Integration section (below).
Room Resource and Calendar Integration
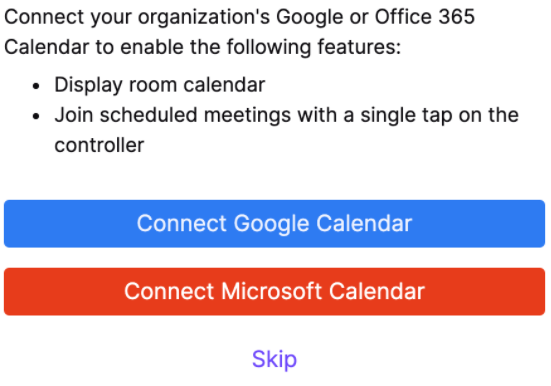
- If you don’t have a calendar integration setup we will present you an option to do that now.
- If you skip this portion of the setup it's okay. You can also find the integration page from https://meetings.dialpad.com/conferencetvs/integrations
- If calendar integration was previously set up, go to the next step of mapping your room to a calendar resource
- [Optional] Map the room you are setting up to a corresponding calendar resource.
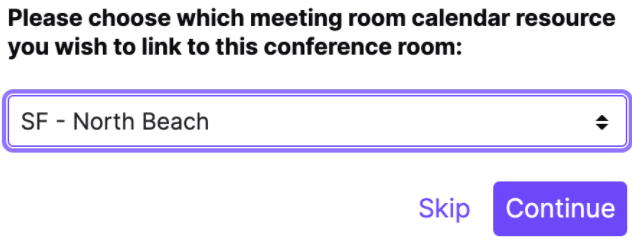
- Select a Room Name and Complete Setup.
- The room name is the publicly visible name that will appear on the TV and in meetings.
- Example of a Google Workspace calendar invitation:

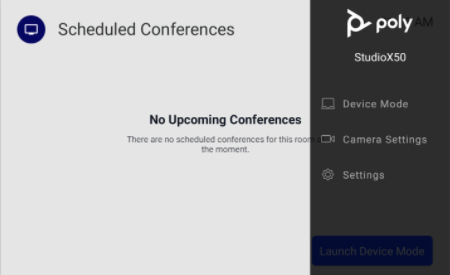
- That's it! Your room should now be set up! You can try it out by launching a Dialpad Meeting on your computer or mobile device.
Configuration Settings & Troubleshooting
Once the setup process is completed, things should go smoothly. If things do not go as intended, here are some of the most common problems that may come up, and steps for resolving them.
Finding the device IP address with the TC8
- Your TC8 should automatically try to pair with your conference room device.
- Swipe in from the right edge of the TC8 to reveal the system menu.
- Press Settings.
- This screen will have both the Serial Number and IP Address of your Connected Room System.
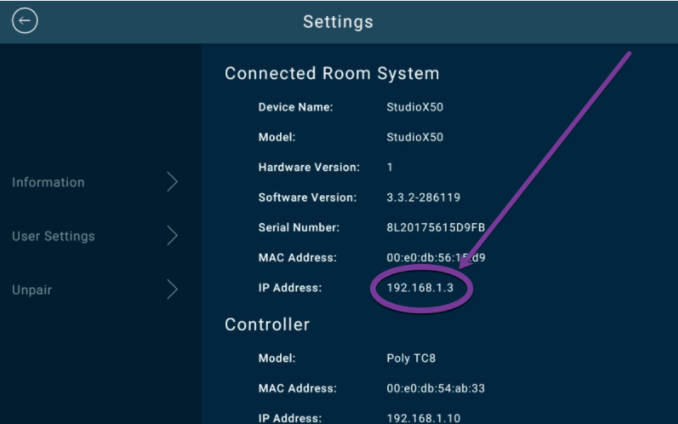
Finding the device IP address
If you’re not using the TC8, the IP Address and Password will also be displayed on the TV screen
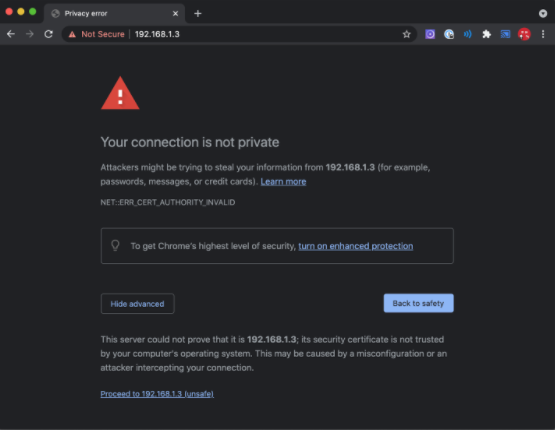
Connecting to the Poly admin screen
- On your computer, open a browser window. Type in the IP address from the previous step.
- You might encounter a warning screen about your connection not being private. Click the Advanced button and click Proceed to [IP address] (unsafe).
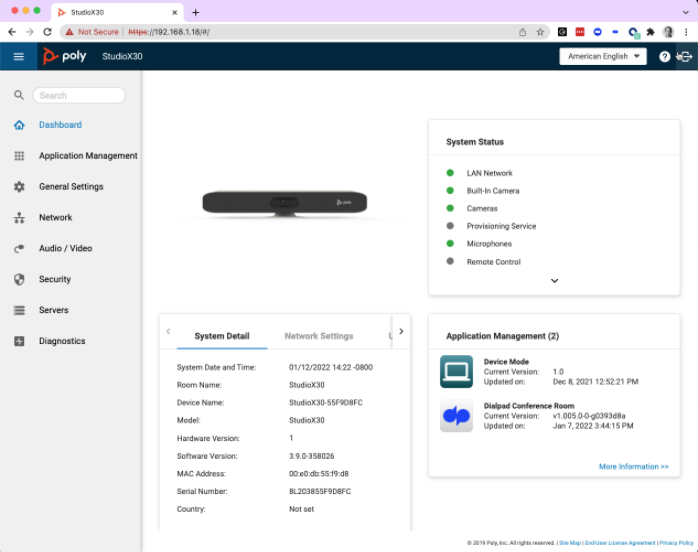
- You should now see the admin login screen of your Poly device

- The default username is admin (lowercase)
- The default password is the last 6 digits of your device’s Serial Number. This is case-sensitive, so all the letters need to be uppercase.
- Note:Be sure to TYPE the password in, copy/paste will not work if you have the password saved on your computer
- Awesome! You should now be logged into the admin panel.
Updating the system
Version 3.2.1 and Higher
- On the left panel, select General Settings → Device Management.
- This screen will check for software updates. If available, it will show an available update for both your devices. Click Update All.
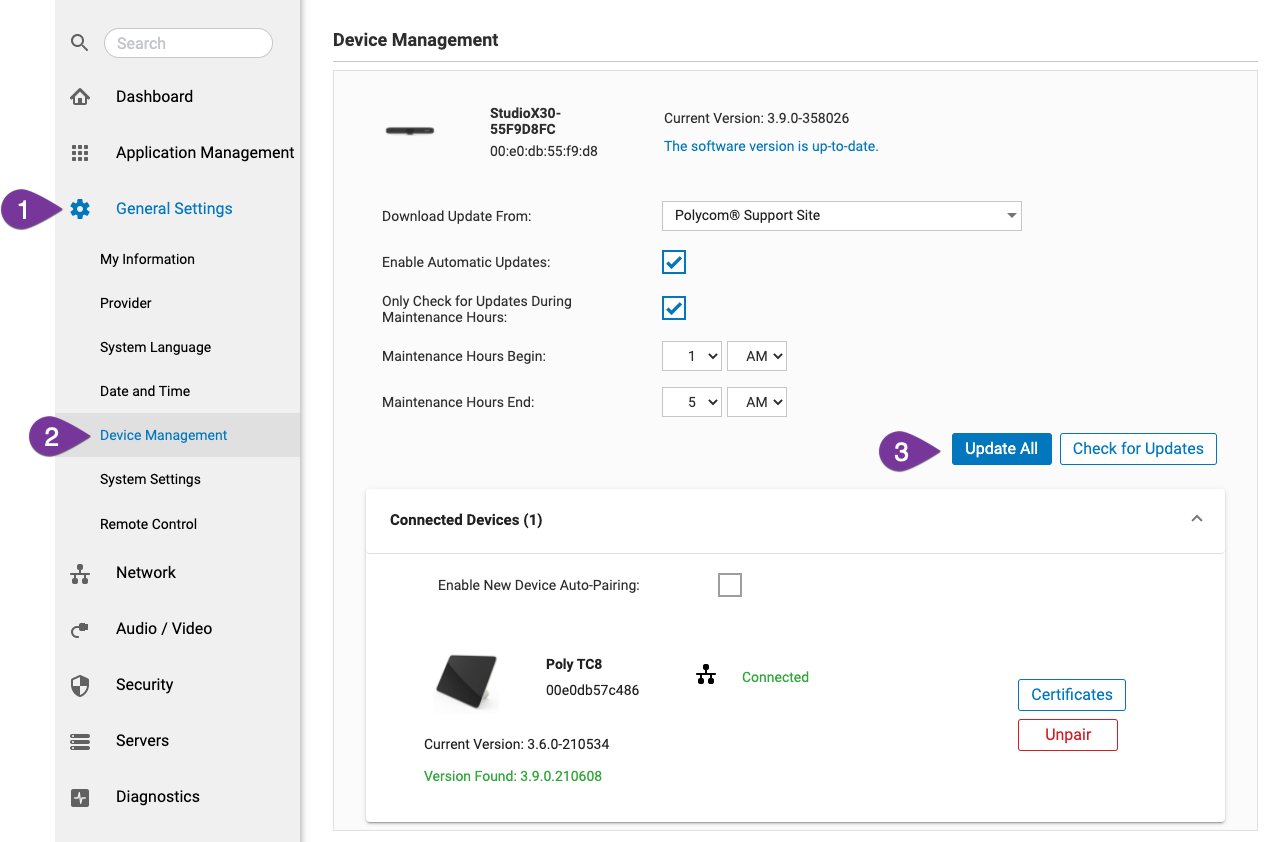
- Your devices will update and restart (sometimes more than once) and you can then choose Dialpad as the conference provider.
Devices on older firmware version
If your room device currently has an older version(< 3.2.1), update it by following these simple steps:
- Head to the Poly device's administration portal
- Navigate to General Settings
- Select Device Management
- Select the Polycom Support Site from the 'Download Update From' field
Your Room Device will download the firmware from the vendor's website and process the update following a reboot.
Date and Time
It’s important to configure your device’s Date and Time, as well as the System Sleep.
- On the left panel, select General Settings and then Date and Time.
- In the dropdown for time zone, select your time zone.