Dialpad supports automatic User-Provisioning lifecycle management via Okta using a SCIM integration. First, you will need to set up SCIM between Dialpad and Okta.
For more information on that process, have a look at this help center article.
Configuration Process
It's as easy as 1-2-3!
There are three actions to be performed in Okta for any attribute to have sync back to Okta from Dialpad.
- Navigate to the Okta Profile Editor (under the Directory section) and add a new attribute to the Okta default User Profile.
- Add a new attribute to the Dialpad application User Profile (handling SCIM).
- Update the Dialpad application User Profile Attribute Mappings to combine/map the two new attributes added in steps 1 and 2.
Let's have a look at the steps to update Okta with the assigned phone number for the user:
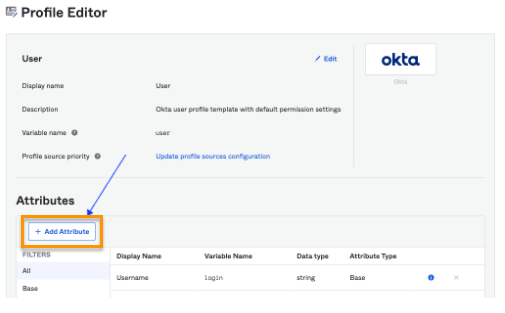
- Log in to your Okta domain as an admin and navigate to the Profile Editor page (under the Directory section).

- Click on the User (default) profile on the resulting page as shown above.
- Navigate to the Attributes section and select Add Attribute.

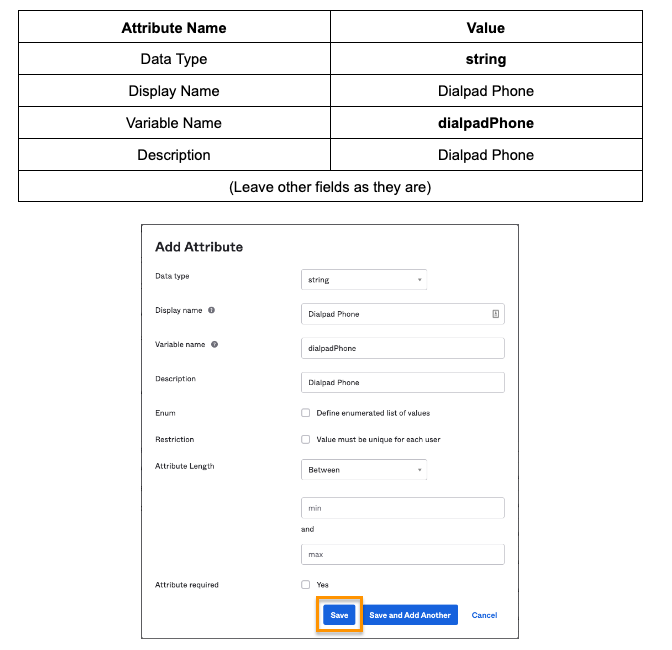
- In the Add Attribute dialog box, enter the following information and click Save:

- Click on the Profile Editor again and select the Dialpad application profilebeing used to manage SSO and SCIM.
.png) NoteThe actual name of the profile will differ from what is shown below.
NoteThe actual name of the profile will differ from what is shown below. - Still within the Attributes section, select Add Attribute.
.png)
- In the Add Attribute dialog box, provide the following information, exactly as written, and leave the other fields as they are. Click on Save:
Attribute Name
Value
Data Type
string
Display Name
Dialpad Phone
Variable Name
dialpadPhone
External Name
phoneNumbers.^[type=='Dialpad'].value
External Namespace
urn:ietf:params:scim:schemas:core:2.0:User
Description
Dialpad Phone
.png)
- Return to the Dialpad Application Profile and click on the Mappings button.
.png)
- Verify that the Dialpad Application to Okta User direction is chosen and scroll down the mappings section:
.png)
- Search for the newly created attribute (dialpadPhone) on the right side (Okta Profile). Select the newly added attribute from the drop-down menu and click Save Mappings.
.png)
- From here, you can either choose to Apply Updates Now (this will update existing users’ profiles [for those who have been assigned the Dialpad application] with the new attribute information) or Don’t Apply Updates (this will apply to new users getting assigned).
- When new users are assigned to the Dialpad application, their Dialpad Phone Numbers attribute in Okta are updated automatically. To verify this, navigate to Directory > People in Okta. Click on the new user and under the Assigned Applications section, click on the Edit button against the Dialpad application. The attribute value should be seen as shown below:
.png)
Pushing numbers to Okta
Okta provides the “Profile Sourcing” feature for an application to act as a source of truth for user-profile attributes.
Let's dive into the configurations needed to be able to push the phone number attribute value to the default Okta profile.
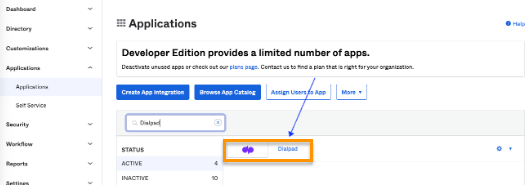
- Navigate to Applications in Okta and click on the Dialpad app.

- Under the Provisioning tab, nested within the Settings section To Okta, click Edit against Profile & Lifecycle Sourcing.
.png)
- Check the checkbox Allow Dialpad to source Okta users and select OK on the pop-up screen.
.png)
- Navigate back to the Profile & Lifecycle Sourcing page, for the option When a user is deactivated in the app. Select the action as Do Nothing. The other options are to be left as-is. Click Save.
.png)
- Under Profile Editor, search for the Dialpad User profile and select Mappings. Ensure Apply mappings on user Create and Update is selected.
.png)
- Return to the Profile Editor and select the Okta User (default) profile.
.png)
- In the Attributes section, click on edit against the Dialpad Phone attribute.
.png)
- And finally, on the resulting screen, select Override Profile Source option from the Source Priority attribute, and choose Dialpad from the resulting drop-down. Click on Save Attribute.
.png)
And voila! From now on, whenever a user is assigned to the Dialpad application, the associated phone number will be sourced from Dialpad and the user’s Okta profile will be updated with the value. Other applications can fetch this value by having another attribute mapping from Okta to the application.